
BTD6 tower guide
Boomerang Monkey BTD6 Upgrade Paths and Paragon
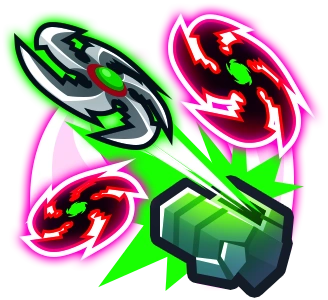
Boomerang Monkey is a BTD6 Primary tower for curved-lane group damage, fast ability bursts, MOAB knockback, and Glaive Dominus Paragon planning.
Updated 2026-06-13 by TDGameTools.
Boomerang Monkey route map
Boomerang Monkey starts simple, then splits into three Tier 5 jobs
Place Boomerang Monkey on bends, loops, or spots where its projectile path travels along the lane. It is less convincing on straight lanes unless you are specifically buying middle-path speed or bottom-path MOAB control.


Quick answer: what is Boomerang Monkey for?
Boomerang Monkey is best when the track shape lets rangs hit the same wave more than once. Top path builds into Glaive Lord for lane coverage, middle path becomes Perma Charge for attack-speed burst, and bottom path becomes MOAB Domination for blimp control.
Visual route map
Base Boomerang Monkey splits into three recognizable routes
Read the route by role first, then decide which path solves the current run.
BaseBoomerang Monkey5-0-0Glaive Lord0-5-0Perma Charge0-0-5MOAB DominationParagonGlaive DominusHow Boomerang Monkey usually fits into a run
Place Boomerang Monkey on bends, loops, or spots where its projectile path travels along the lane. It is less convincing on straight lanes unless you are specifically buying middle-path speed or bottom-path MOAB control.
Upgrade routes
Boomerang Monkey's three path identities
Use this as a role summary, not a patch-perfect damage table.
 3-x-xGlaive Ricochet
 4-x-xM.O.A.R. Glaives5-x-xGlaive Lord
Top path
Glaive Lord
Curved-lane group damage with orbiting cleanup near the tower.
- Best when
- A bend or loop keeps bloons inside the glaive orbit and projectile path.
- Watch out
- Long straight lanes waste much of the tower's natural multi-hit value.
- Beginner read
- Move it around in sandbox-style planning until the path shape makes sense.
 x-3-xBionic Boomerang
 x-4-xTurbo Chargex-5-xPerma Charge
Middle path
Perma Charge
High attack-speed damage for players willing to build around bursts and buffs.
- Best when
- You want a fast-shooting Primary carry with support nearby.
- Watch out
- It can underperform if bought late without enough support or track contact.
- Beginner read
- Think of it as a focused carry path, not a random mid-game patch.
 x-x-3Kylie Boomerang
 x-x-4MOAB Pressx-x-5MOAB Domination
Bottom path
MOAB Domination
MOAB-class knockback and control that buys time for the rest of the defense.
- Best when
- The run keeps losing to blimps reaching the exit too quickly.
- Watch out
- Control does not replace enough damage for ceramics and fortified layers.
- Beginner read
- Use it with damage towers behind the pushback, not alone.
Common uses
When Boomerang Monkey makes sense
- Cover dense grouped bloons on bends where rangs re-enter the lane.
- Add MOAB Press or MOAB Domination when blimps need more stall time.
- Build a buffed Perma Charge plan when you want a Primary tower to carry damage.
- Feed Glaive Dominus planning in boss or late-game setups.
Mistakes
What usually goes wrong
- Placing it on a straightaway and judging the tower before testing a better bend.
- Buying MOAB control without enough follow-up damage to clear what gets pushed back.
- Treating Perma Charge like a cheap patch instead of a supported carry.
- Forgetting camo or lead checks when the Boomerang path itself is not covering them.
Paragon branch
Glaive Dominus
The Boomerang Monkey Paragon combines the three Tier 5 Boomerang Monkey paths. Use the TDGameTools calculator and planner pages before committing cash, pops, upgrade tiers, extra Tier 5s, and Geraldo totems.
5-0-00-5-00-0-5Glaive DominusRelated BTD6 pages
Sources and scope
This page is a concise TDGameTools tower guide, not an official wiki clone. Use it to understand roles and internal planning links, then verify live game values for exact patch or boss-event planning.
FAQ
What is Boomerang Monkey good for in BTD6?
Boomerang Monkey is best when the track shape lets rangs hit the same wave more than once. Top path builds into Glaive Lord for lane coverage, middle path becomes Perma Charge for attack-speed burst, and bottom path becomes MOAB Domination for blimp control.
Which Boomerang Monkey upgrade paths should I compare?
Boomerang Monkey has three main route identities: 5-0-0 Glaive Lord, 0-5-0 Perma Charge, 0-0-5 MOAB Domination. Compare them by the job you need, not by a single permanent best path.
Does Boomerang Monkey have a Paragon?
Yes. Boomerang Monkey connects to Glaive Dominus, so use the calculator and planner links before committing a late-game or boss setup.